
If you love a good DIY to create a one of a kind Disney themed Halloween decor, this is for you!
I love Halloween. It’s one of my favorite Holidays. I love the cooler temps, flannel shirts and cozy vibes. I always put out my Halloween decor pretty early because it makes me happy and why not?
This year I can across a ghost DIY decor piece and I couldn’t help but think about putting my own Disney spin on it. Bonus: most of my supplies either came from crafting stuff I already had on hand or from The Dollar Tree, making this an inexpensive arts and crafts project you can do with the whole family!
This is sure to be a fun project! And if you want more Disney DIYs I got you covered!
To begin let’s talk about supplies. While I was able to get a gold picture frame and Mod Podge from my local store, you can also easily get these from Amazon for a great price as well! Let’s dive into what you’ll need to create this super cute ghost Mickey!
Supplies:
Frame:
First you will need a base to display your project. You can go for a gold frame (like I did) or you can get a gold mirror. I think this one and this one are super cute and would work perfectly! While these ones are a little more ornate than the one I ended up using, I think that they definitely add spooky/ Haunted Mansion vibes!
pearls and beads:
Secondly, you will need pearls of various sizes and/or beads. I used the pearls for most of the project but made sure to use black, shimmery beads for Mickey’s eyes and mouth. Here are the pearls I used as well as some black/colored beads. You could also opt for these crafting pearls (which comes with tiny sizes that come in handy for the smaller crevices of the design and comes with crafting tweezers) but I personally like the bead pearls and gems better (I just tried to be strategic with the placement so the hole part wasn’t as visible). They’re a little easier to apply and overall I think they look better.
Background:
You will also need either a piece of black construction paper (which is what I ended up using) or black craft paint for the backdrop of the frame. This is what will really make the white color of the pearls stand out!
Glue:
And while you could use any kind of glue you prefer for the beads, I chose matte Mod Podge because it’s pretty forgiving, washable and doesn’t have a strong odor. This Mod Podge set comes with sponge brushes that may come in handy applying it to your image! I used even smaller sponges like this for some areas of the design.
Tools:
The last item that will come in handy is a good pair of crafting tweezers. You can find those here. I found that these worked better than my fingers or other tools that I tried.
Steps:

Etsy image by Magicalmakingco
First your going to want to find a Mickey Mouse ghost image that you like on Google. There are cute ones on Etsy. Once you find the perfect one, you’ll want to cut him out with scissors. Place him on top of your black construction paper or some sort of crafting surface and add some Mod Podge to one area at a time. (I find it’s best to work with one small area at a time)
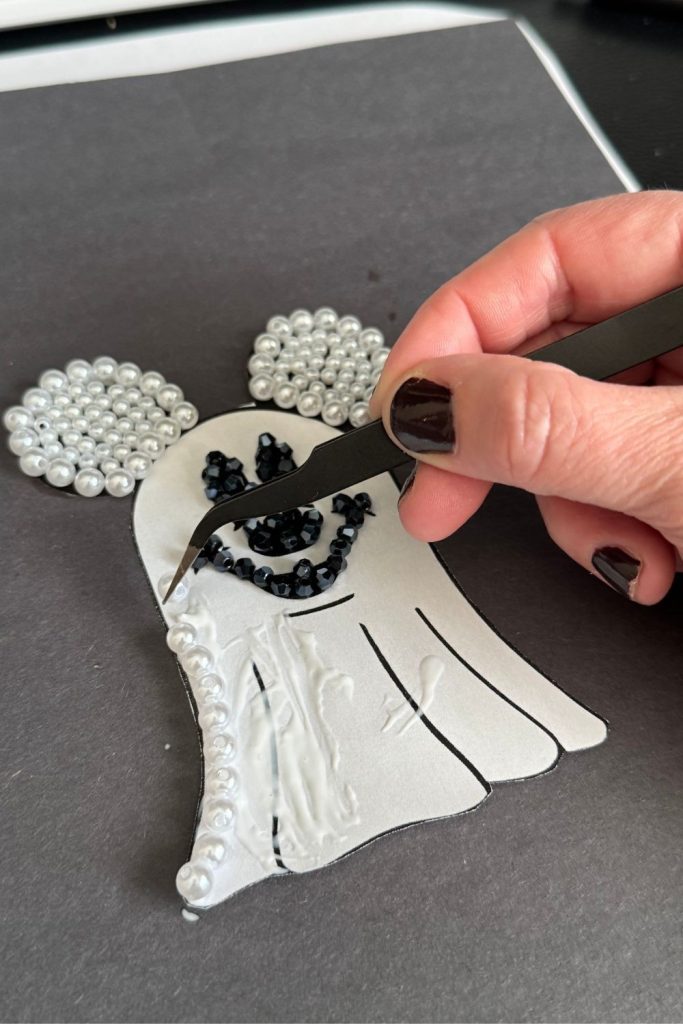
Next you’re going to start applying your beads exactly where you want them, You’re just going to keep adding beads until it looks the way you want it to. I chose to glue larger pearl beads for the perimeter of Mickey and smaller ones for the inside of him. I think this gives him more dimension. Keep in mind that for smaller kids this can become difficult and they may need help. If your child is really young please provide supervision so they don’t choke on any beads!
Then glue your Mickey to the black construction paper and cut to size for your frame. Insert into frame or onto mirror (I glued mine to the glass insert) and Ta da! Super easy! Sidenote: You’ll want to make sure that your beads are dried before trying to display the final project.

The finished product is a cute Mickey ghost that you can proudly display all throughout the Halloween season. The possibilities are endless, you could add orange colored beads for a little pumpkin, or red for Minnie’s bow! The best part is that you’ll have fun making it and it’s budget friendly! I hope that this gives you an idea of all the different Disney crafting you can do!